Viewing entries tagged
Programming

2 Comments

Sappho in Max/MSP: Poetry, Sound, and Programming

I am an experimental psychologist and data analyst with a bent for poetry and art. I have also long been a fan of the Greek poet Sappho. Consequently, for my final project in my independent studies course on Max/MSP/Jitter, I decided to create a small piece of programmed art based on her work. I took one of her poetry fragments – written in Greek about 2500 years ago – and three modern translations of it, by Jim Powell, Kenneth Rexroth, and Sam Hamill, respectively. The patch is only minimally interactive in that the user simply presses "Start" but there is a lot of coding underneath that. This first YouTube video is a demonstration of the finished patch:

[youtube=http://www.youtube.com/watch?v=hp2qb6KBQXY]

This second YouTube video provides a technical walkthrough of the project:

[youtube=http://www.youtube.com/watch?v=LtdOBfpWK30]

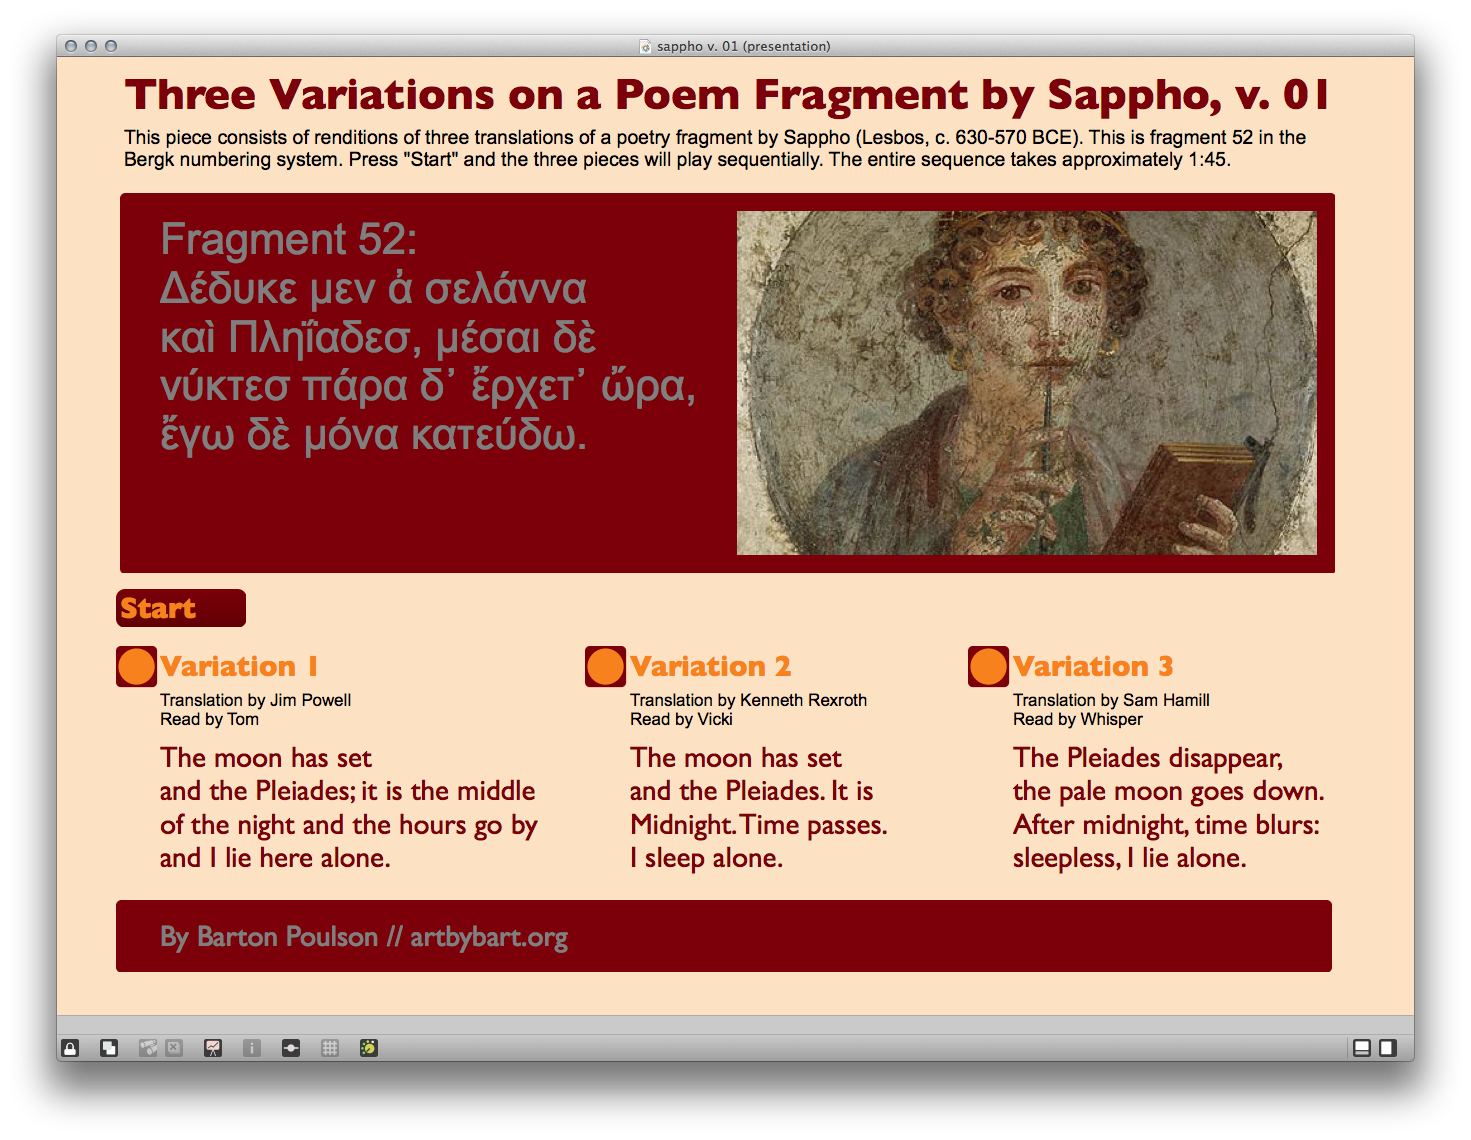
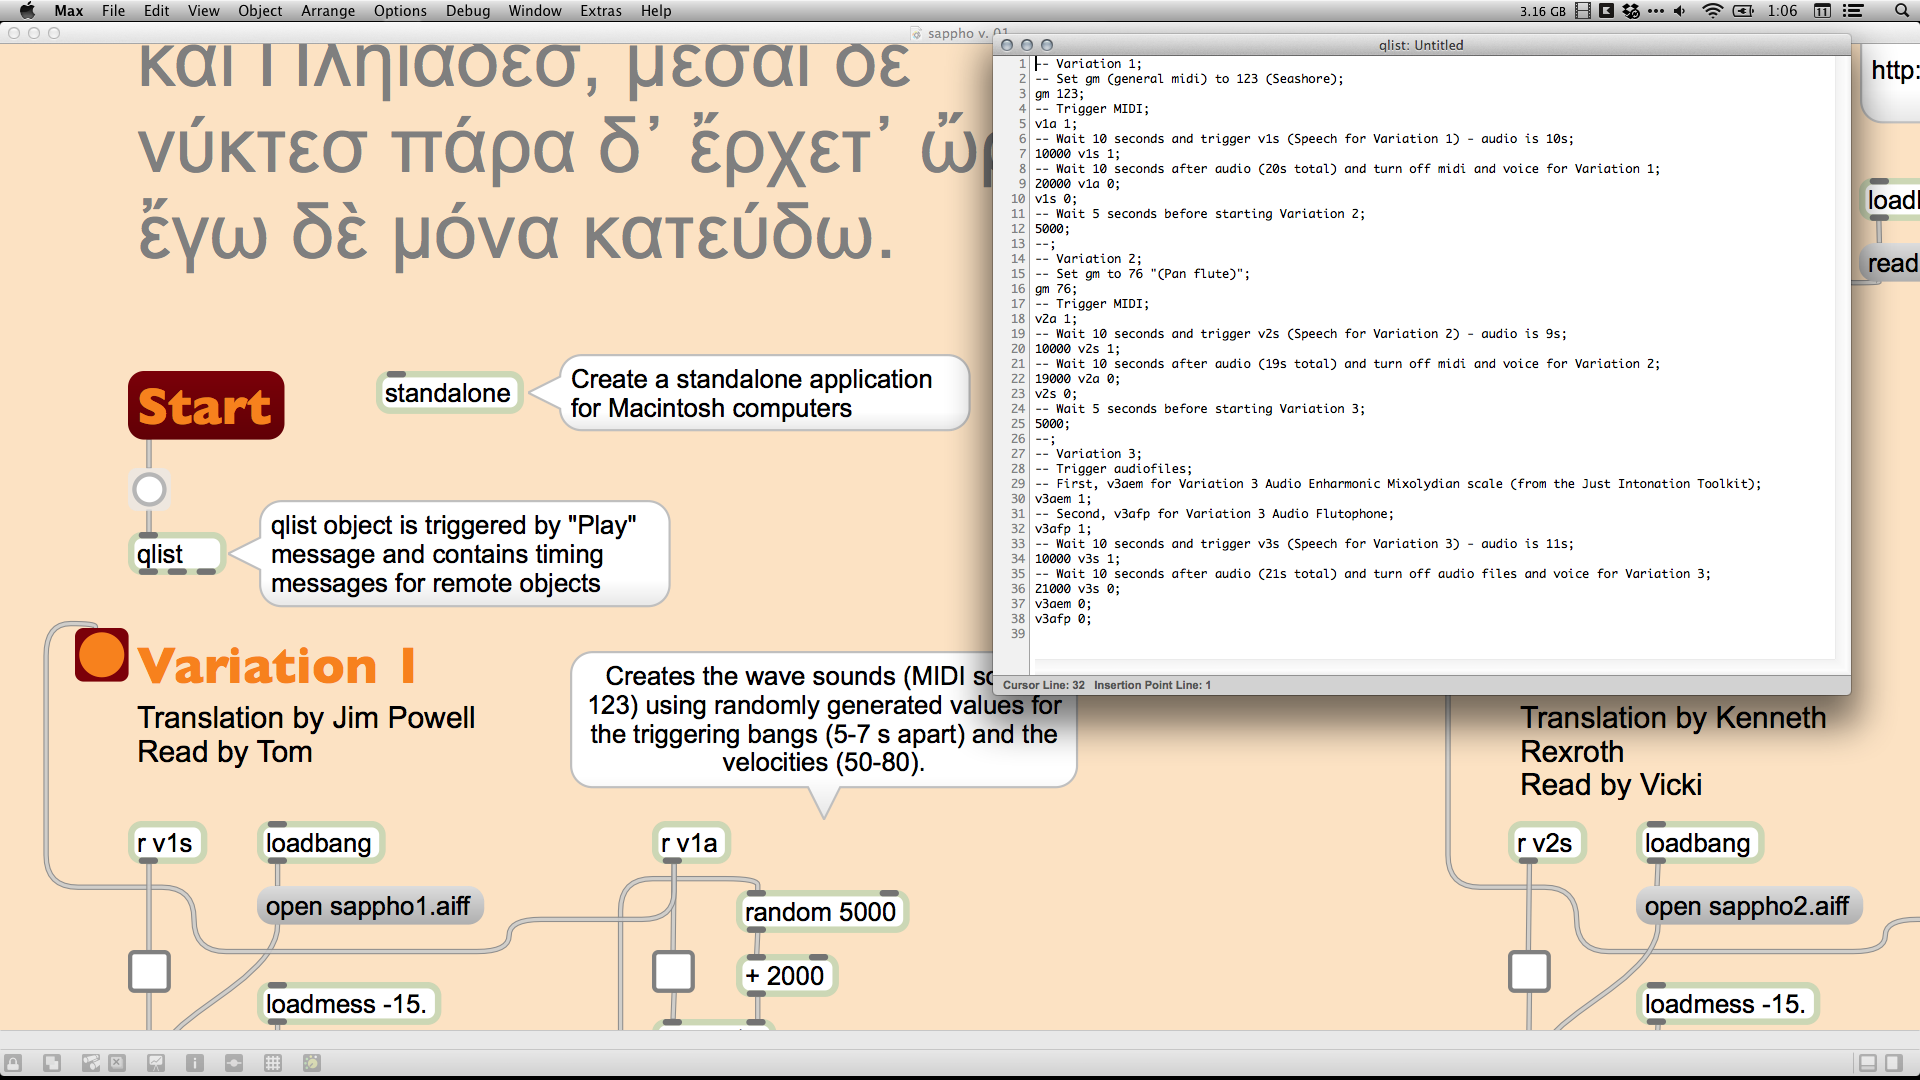
Here's the text version of that explanation (more or less). I wanted to have audio recordings of the three versions of the poem. Because I could and because I thought it would make a nice contrast with the extreme earthiness of the poem, I decided to use computer voices. I chose three of the voices that come with Macintoshes: Tom, Vicki, and Whisper. For each poem, I put the text in TextEdit and, in the TextEdit > Services menu, chose "Add to iTunes as a Spoken Track." (I think I added that function at some point but I can't remember when or from whence it came.) From there I converted each of the computer voice recordings from the default iTunes AAC format to a more-Max-friendly AIFF format and added them to the same folder as the Sappho patch.

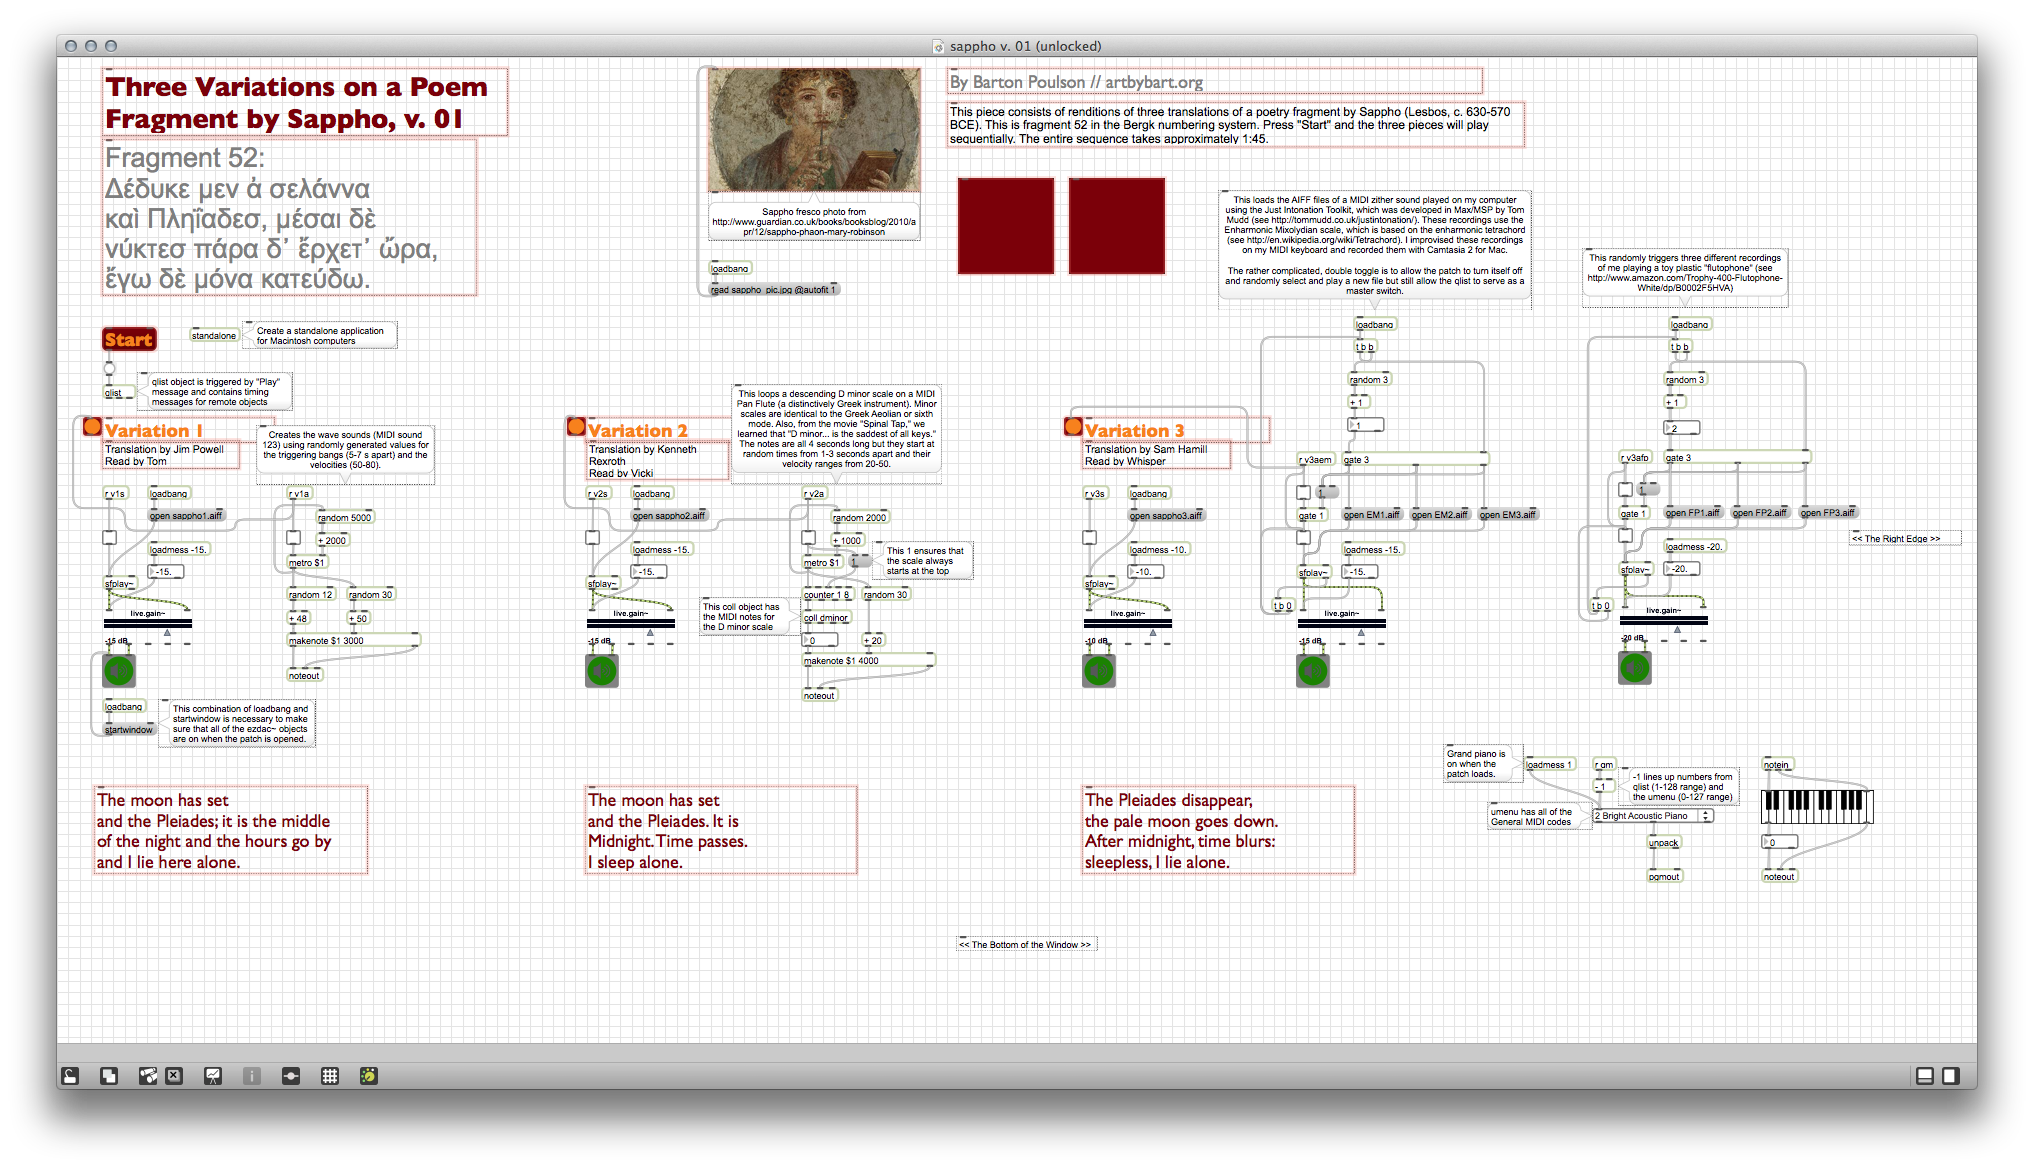
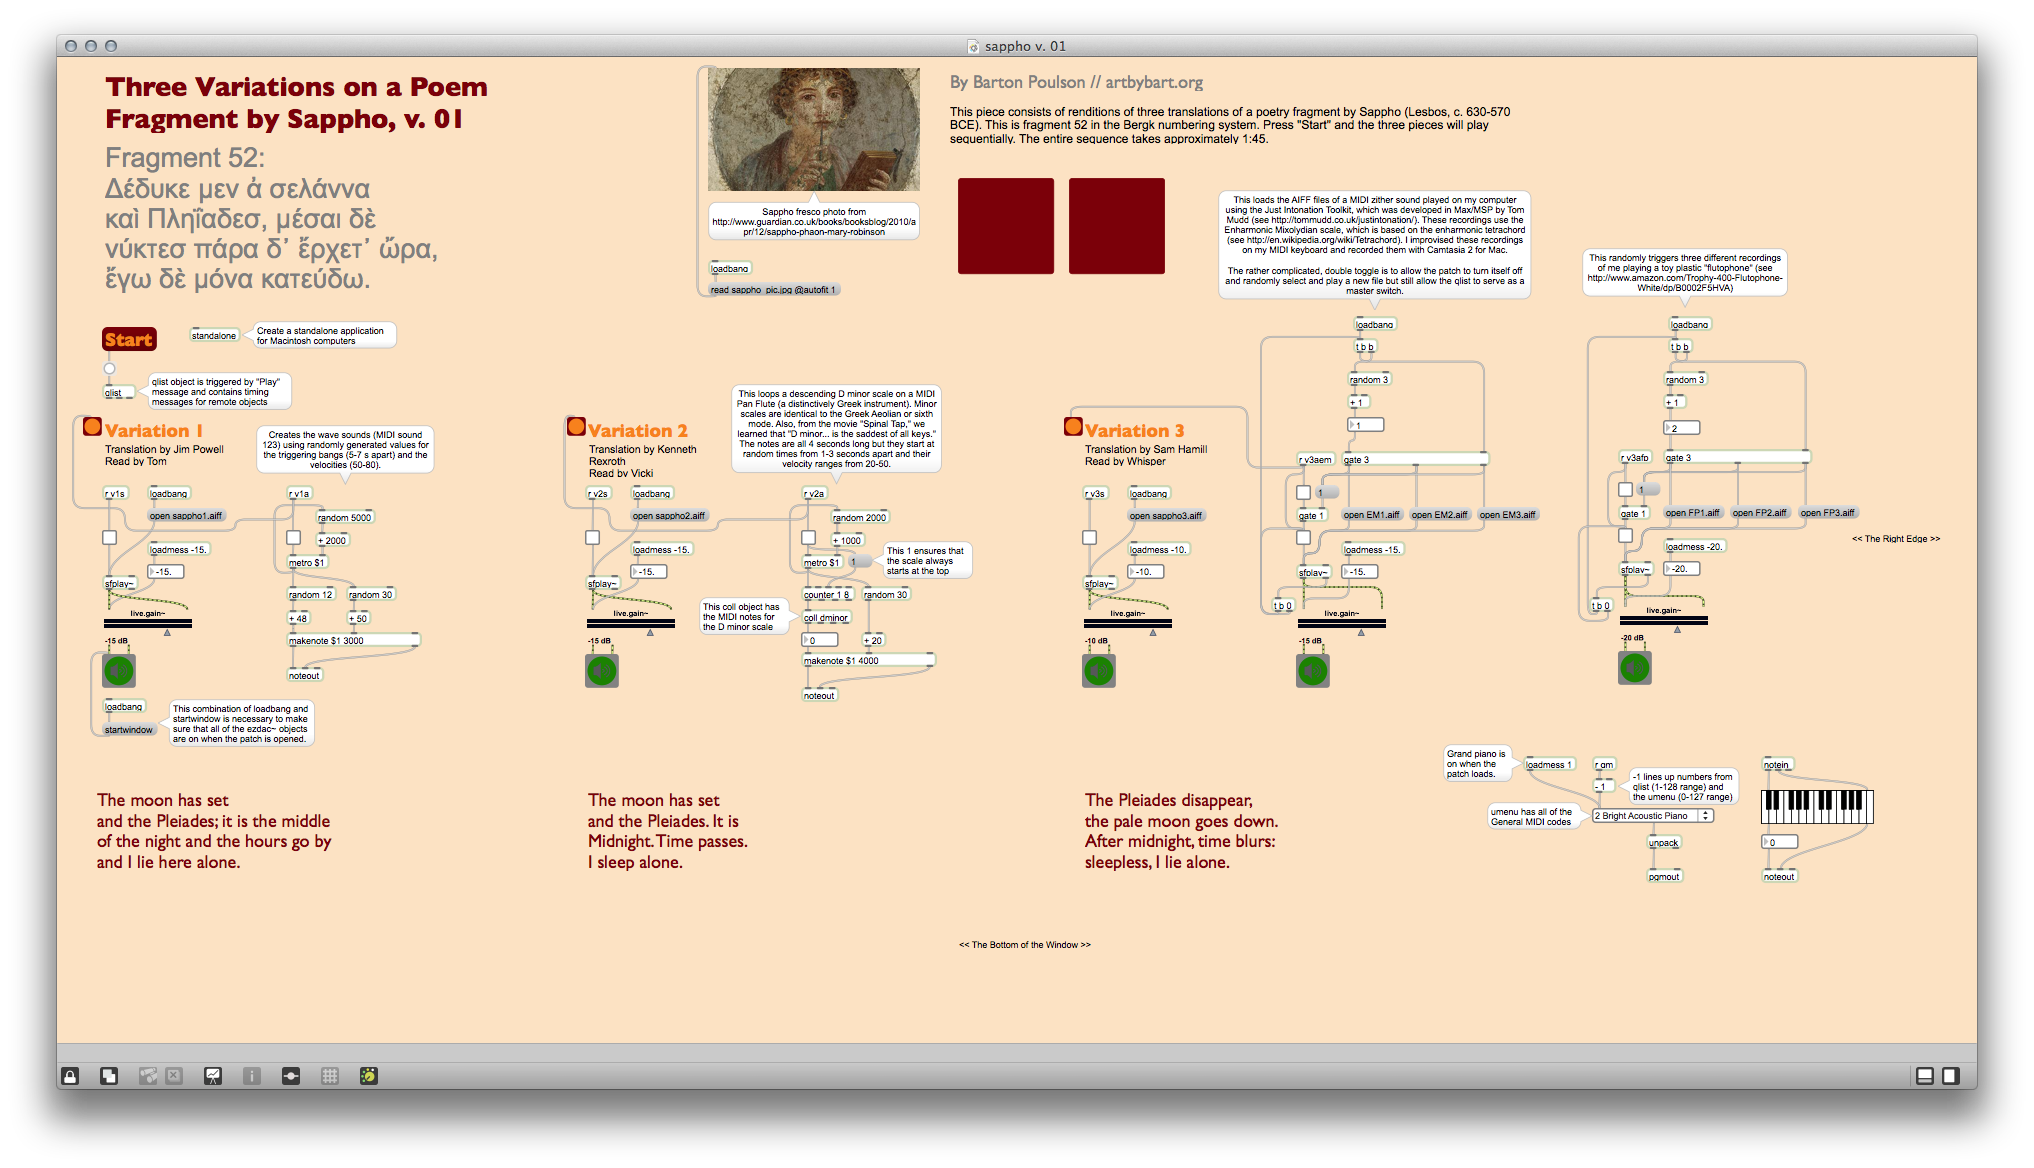
In order to control the playback of the various items, I created a qlist object that would contain all the timing information and remote sends to the various objects. In each case, this started the background sounds first (for 5 seconds) and then the voice recordings (about 10 seconds), with the background continuing for about 10 more seconds after that.

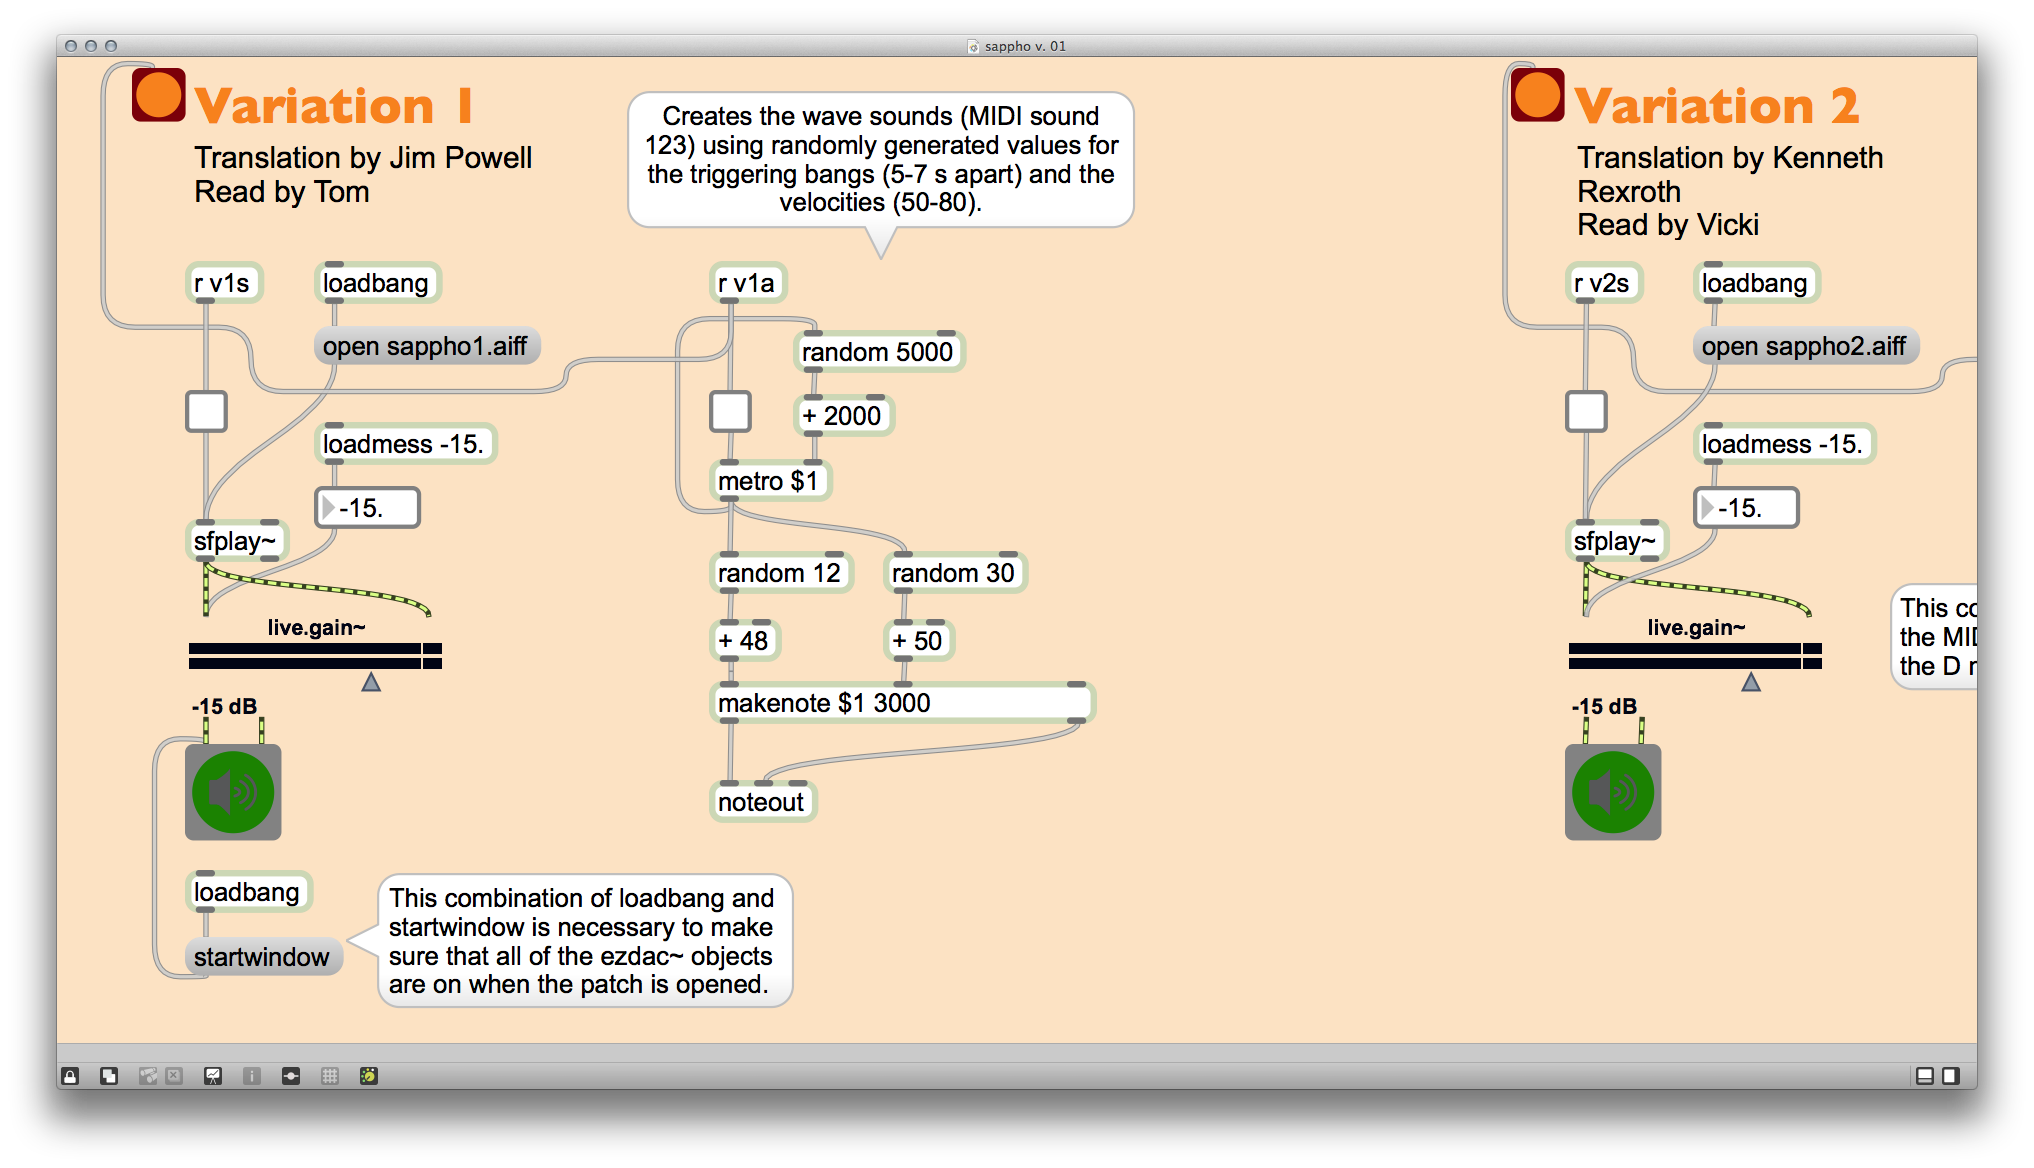
Variation 1 uses Seashore sounds (MIDI 123) because, you know, Sappho lived on an island. These wave sounds are all the same length (3 seconds) but they start at randomized times (2-7 seconds apart) and play with randomized velocities/volumes (50-80 on a 0-127 scale). Those variations make the artificial MIDI waves sound a little more realistic.

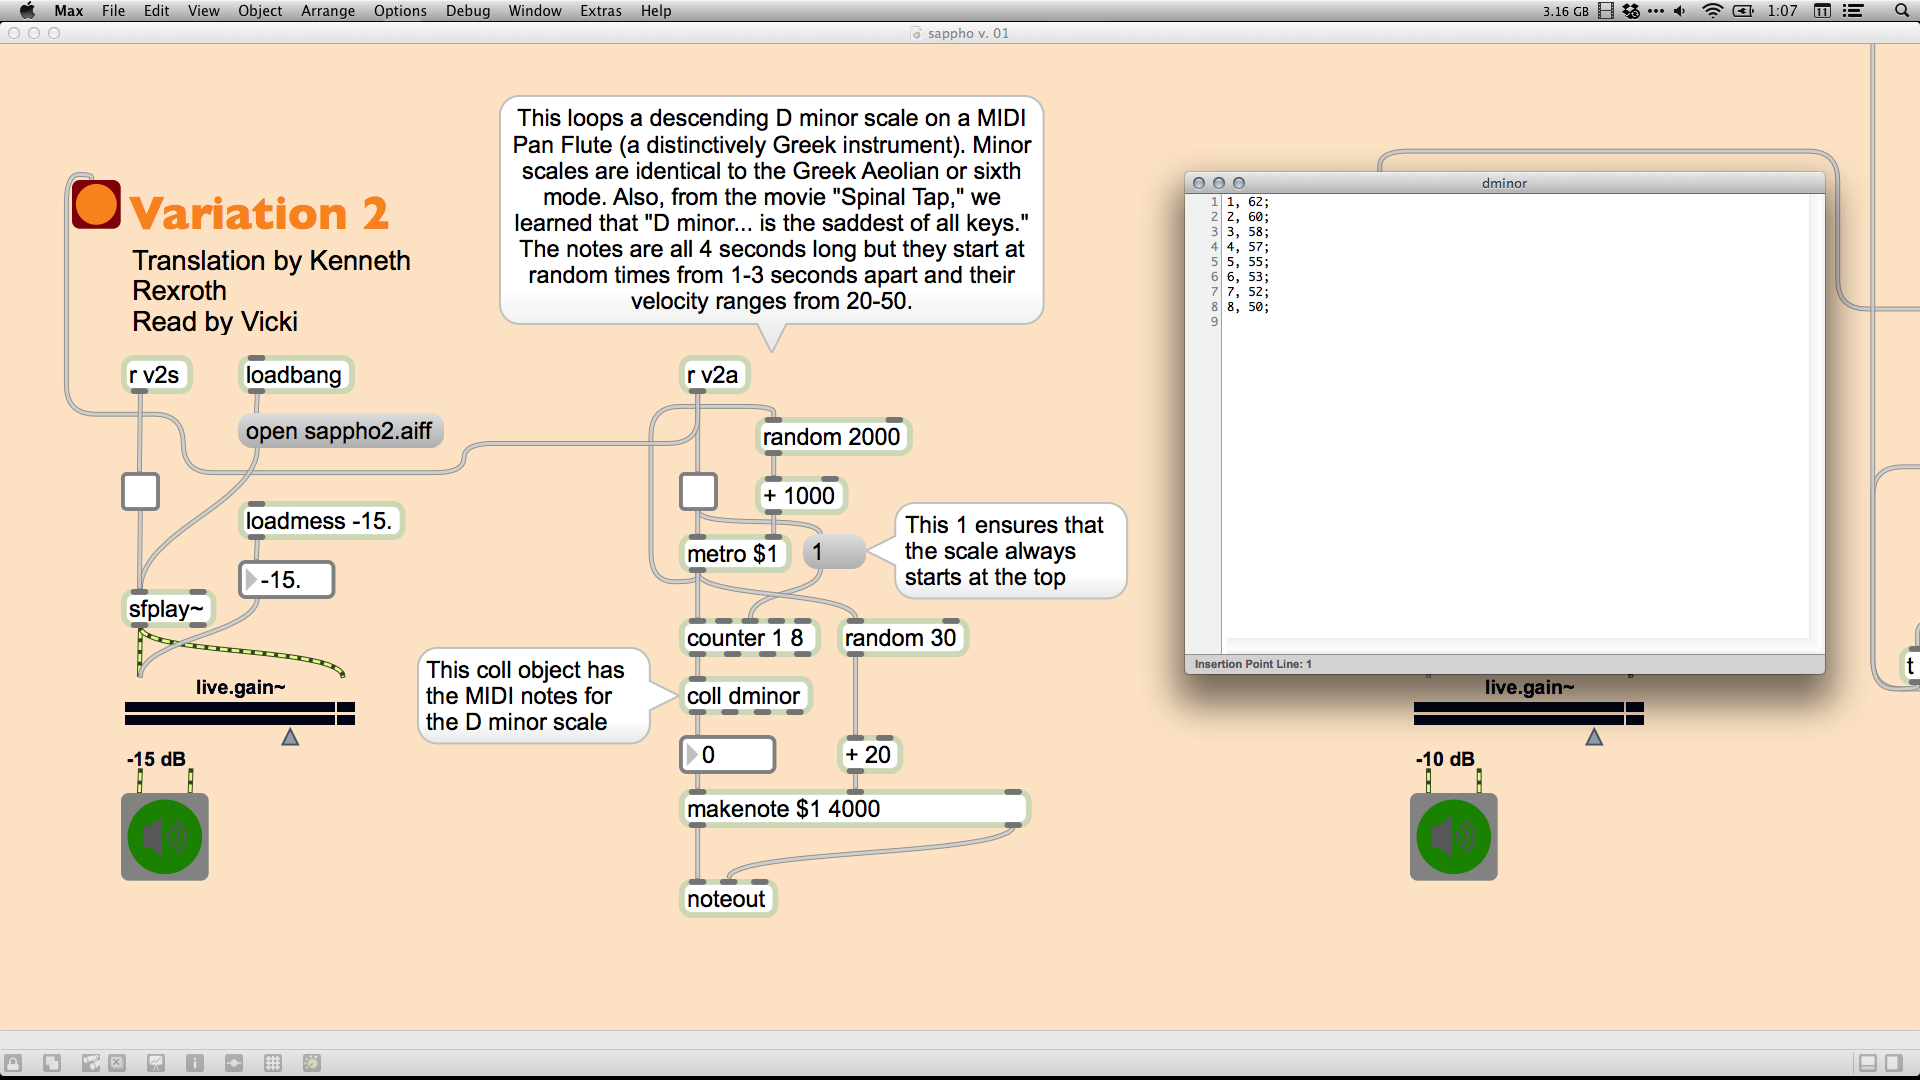
Variation 2 uses a Greek instrument, Pan flutes (MIDI 76), to plays loops of a descending scale, as descending is more in line with the melancholy feel of the poem. The scale is D minor for two reasons: the minor scales are identical to the Greek Aeolian scales and, as we learned from Nigel Tufnel in This Is Spinal Tap, "D minor... is the saddest of all keys, I find. People weep instantly when they hear it, and I don't know why." The MIDI notes for the scale are contained in a coll object and are referenced in a looping manner by a counter object. Like the waves in Variation 1, the notes in the descending scale start at randomized times (1-3 seconds apart) but stay in order and have randomized velocities/volumes (20-50). In addition, a message of "1" that connects the toggle and the counter object makes sure that the scale always starts at the top note.

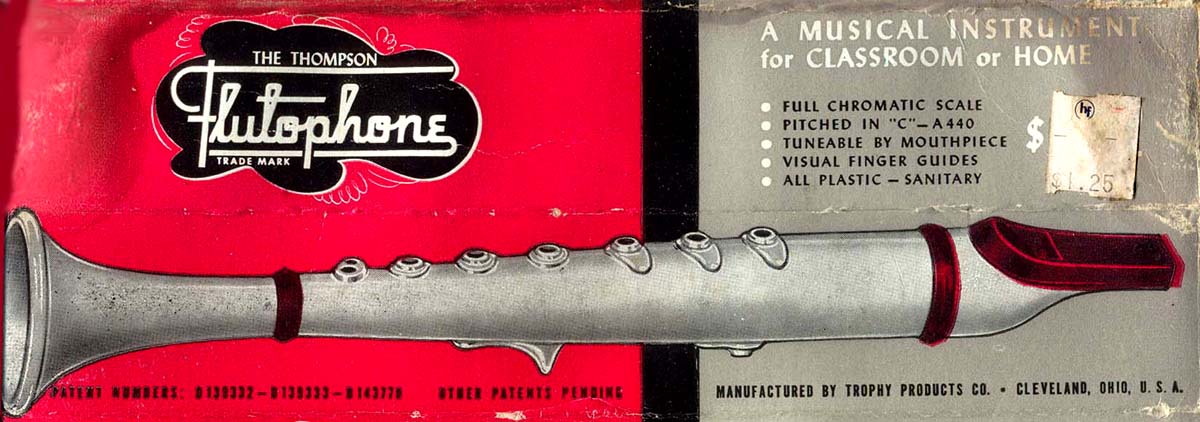
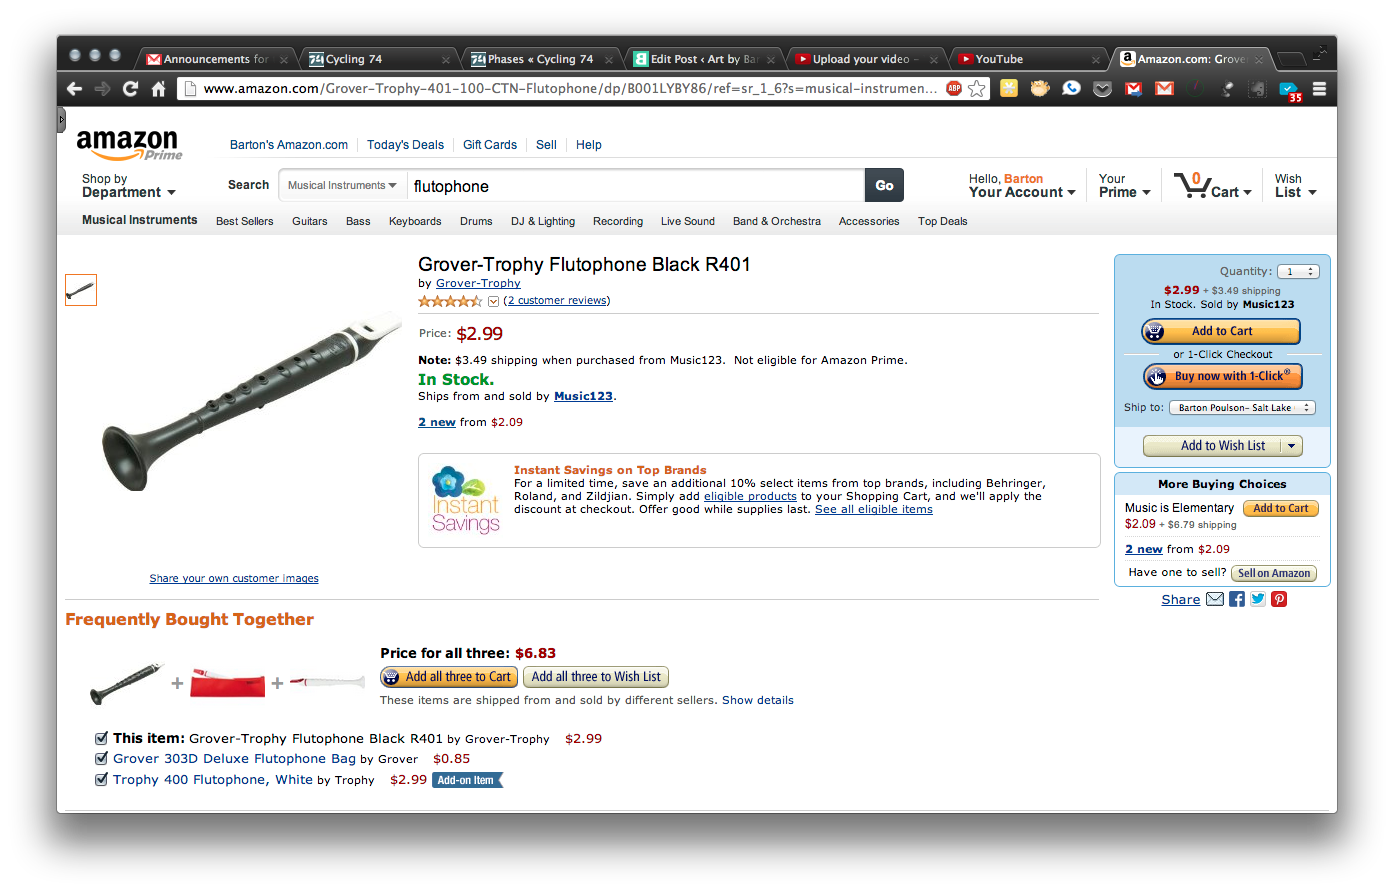
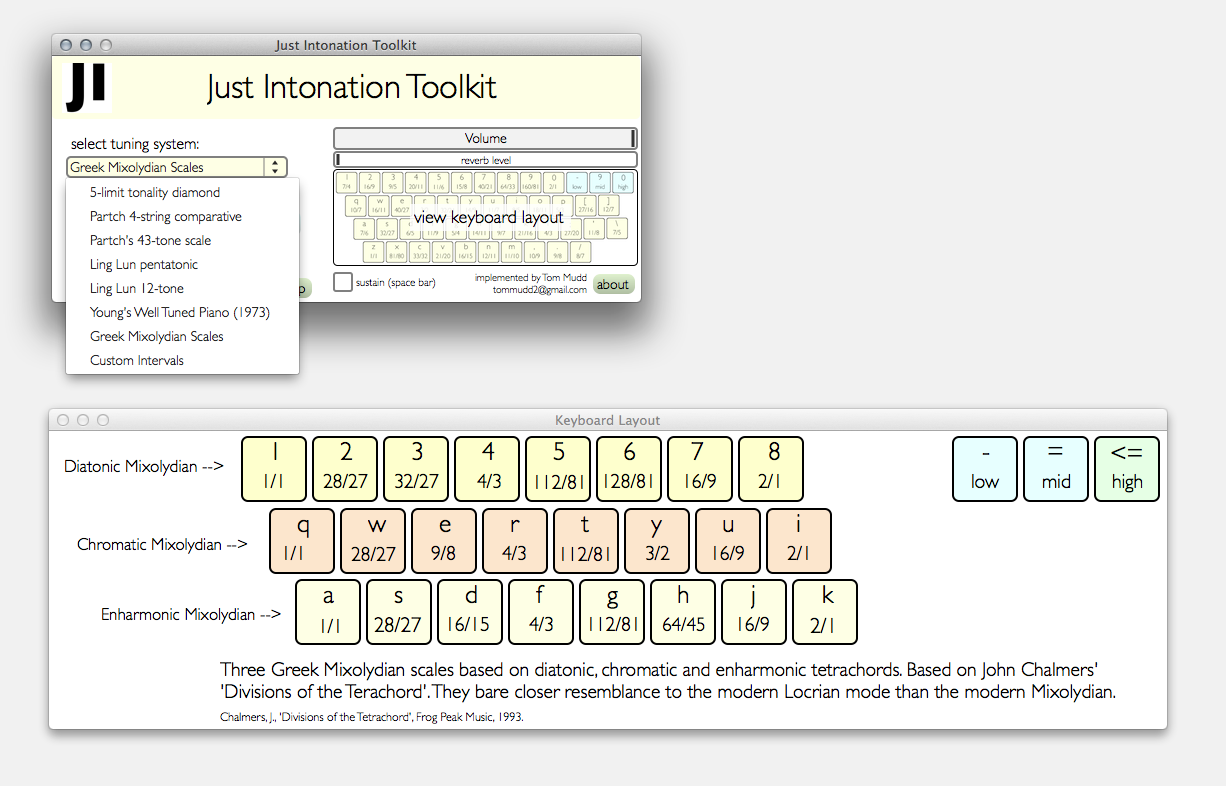
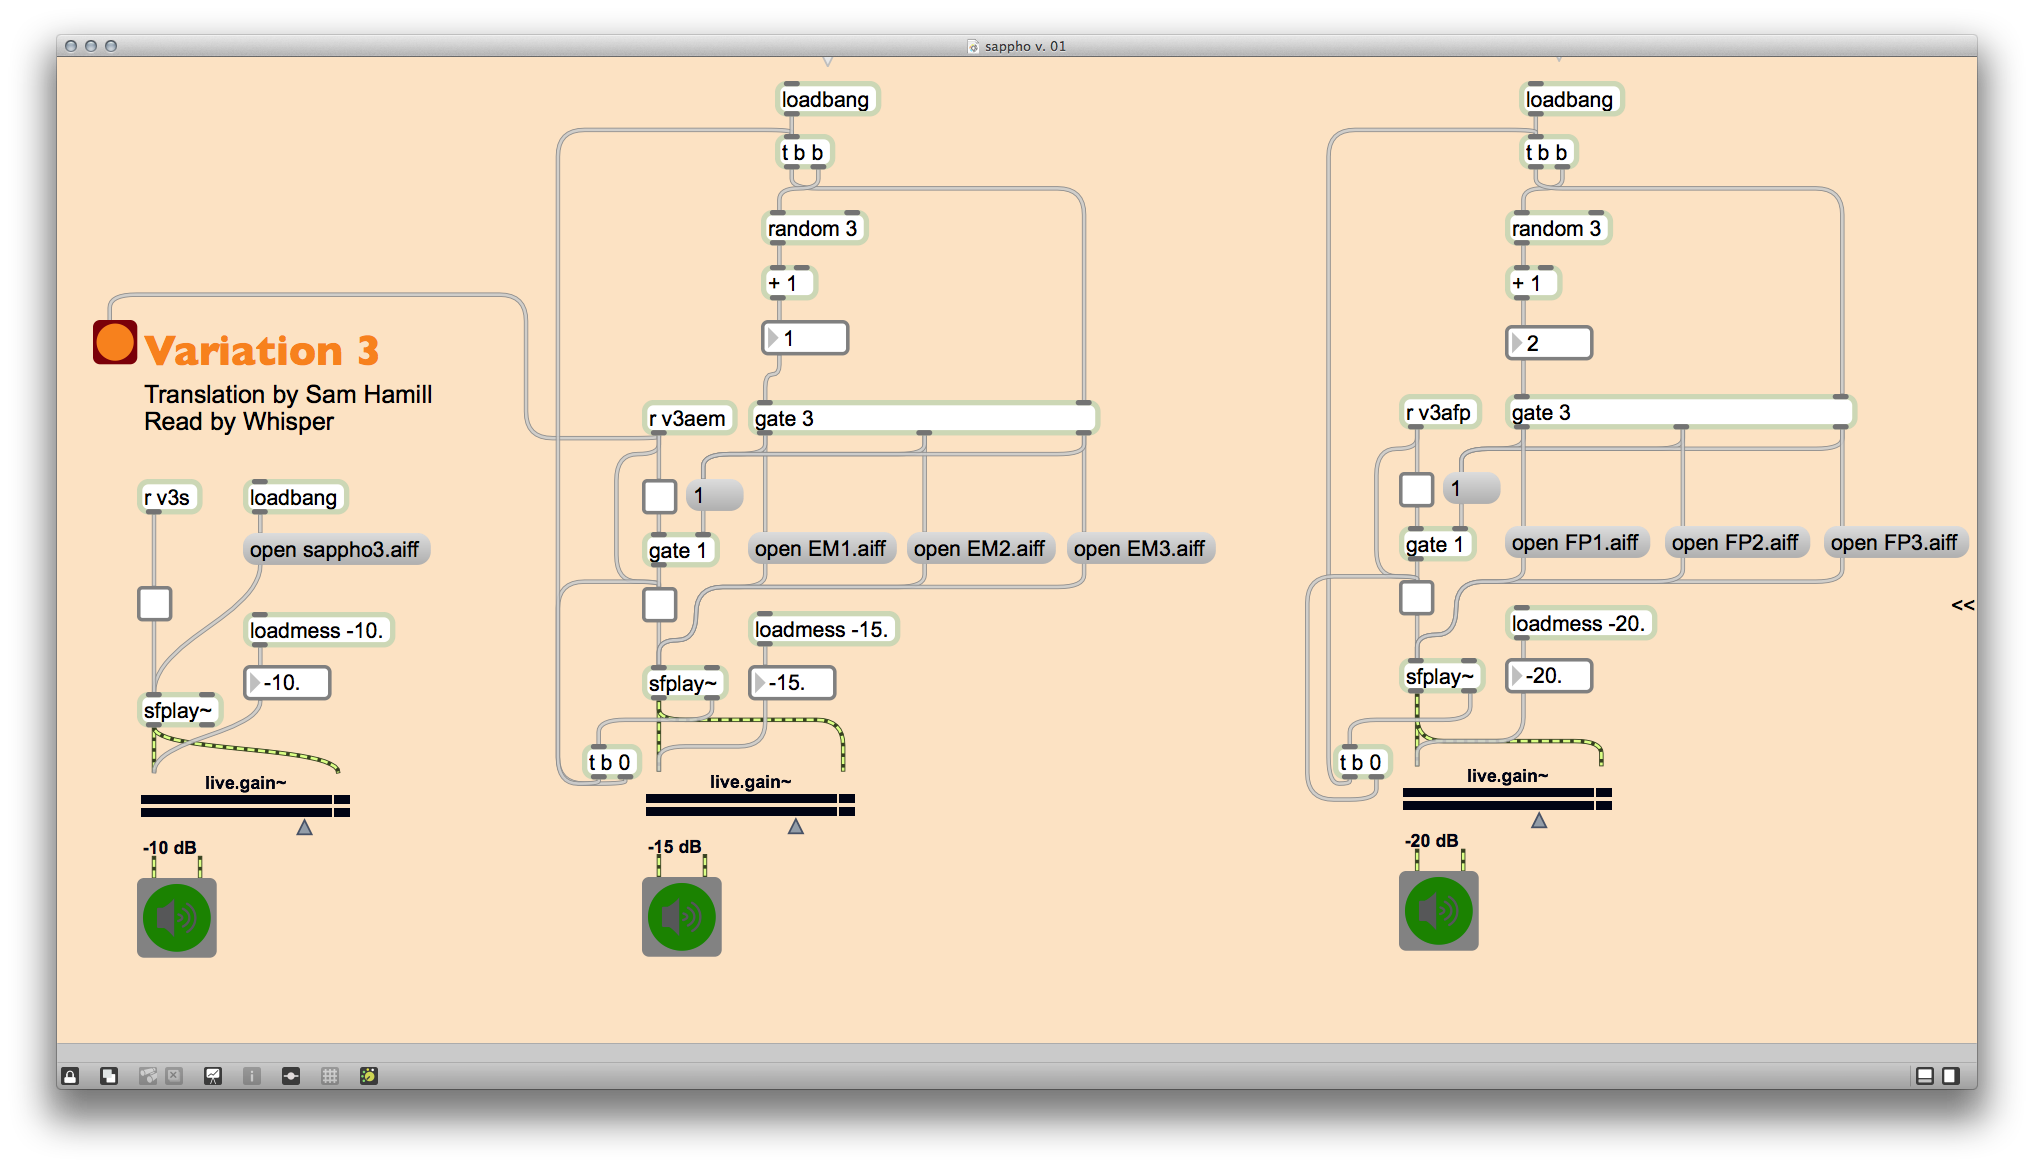
Variation 3 concludes the performance with music that I personally performed and recorded. There are two music elements playing simultaneously: (1) MIDI keyboard of a zither playing in an Enharmonic Mixolydian scale, and (2) an toy plastic flutophone. The most complicated part of this patch was the routing necessary to make it possible to randomly select and start one of the three recordings in each element while still allowing the qlist to serve as a master on/off control. This was accomplished with dual toggles and gates for each element.

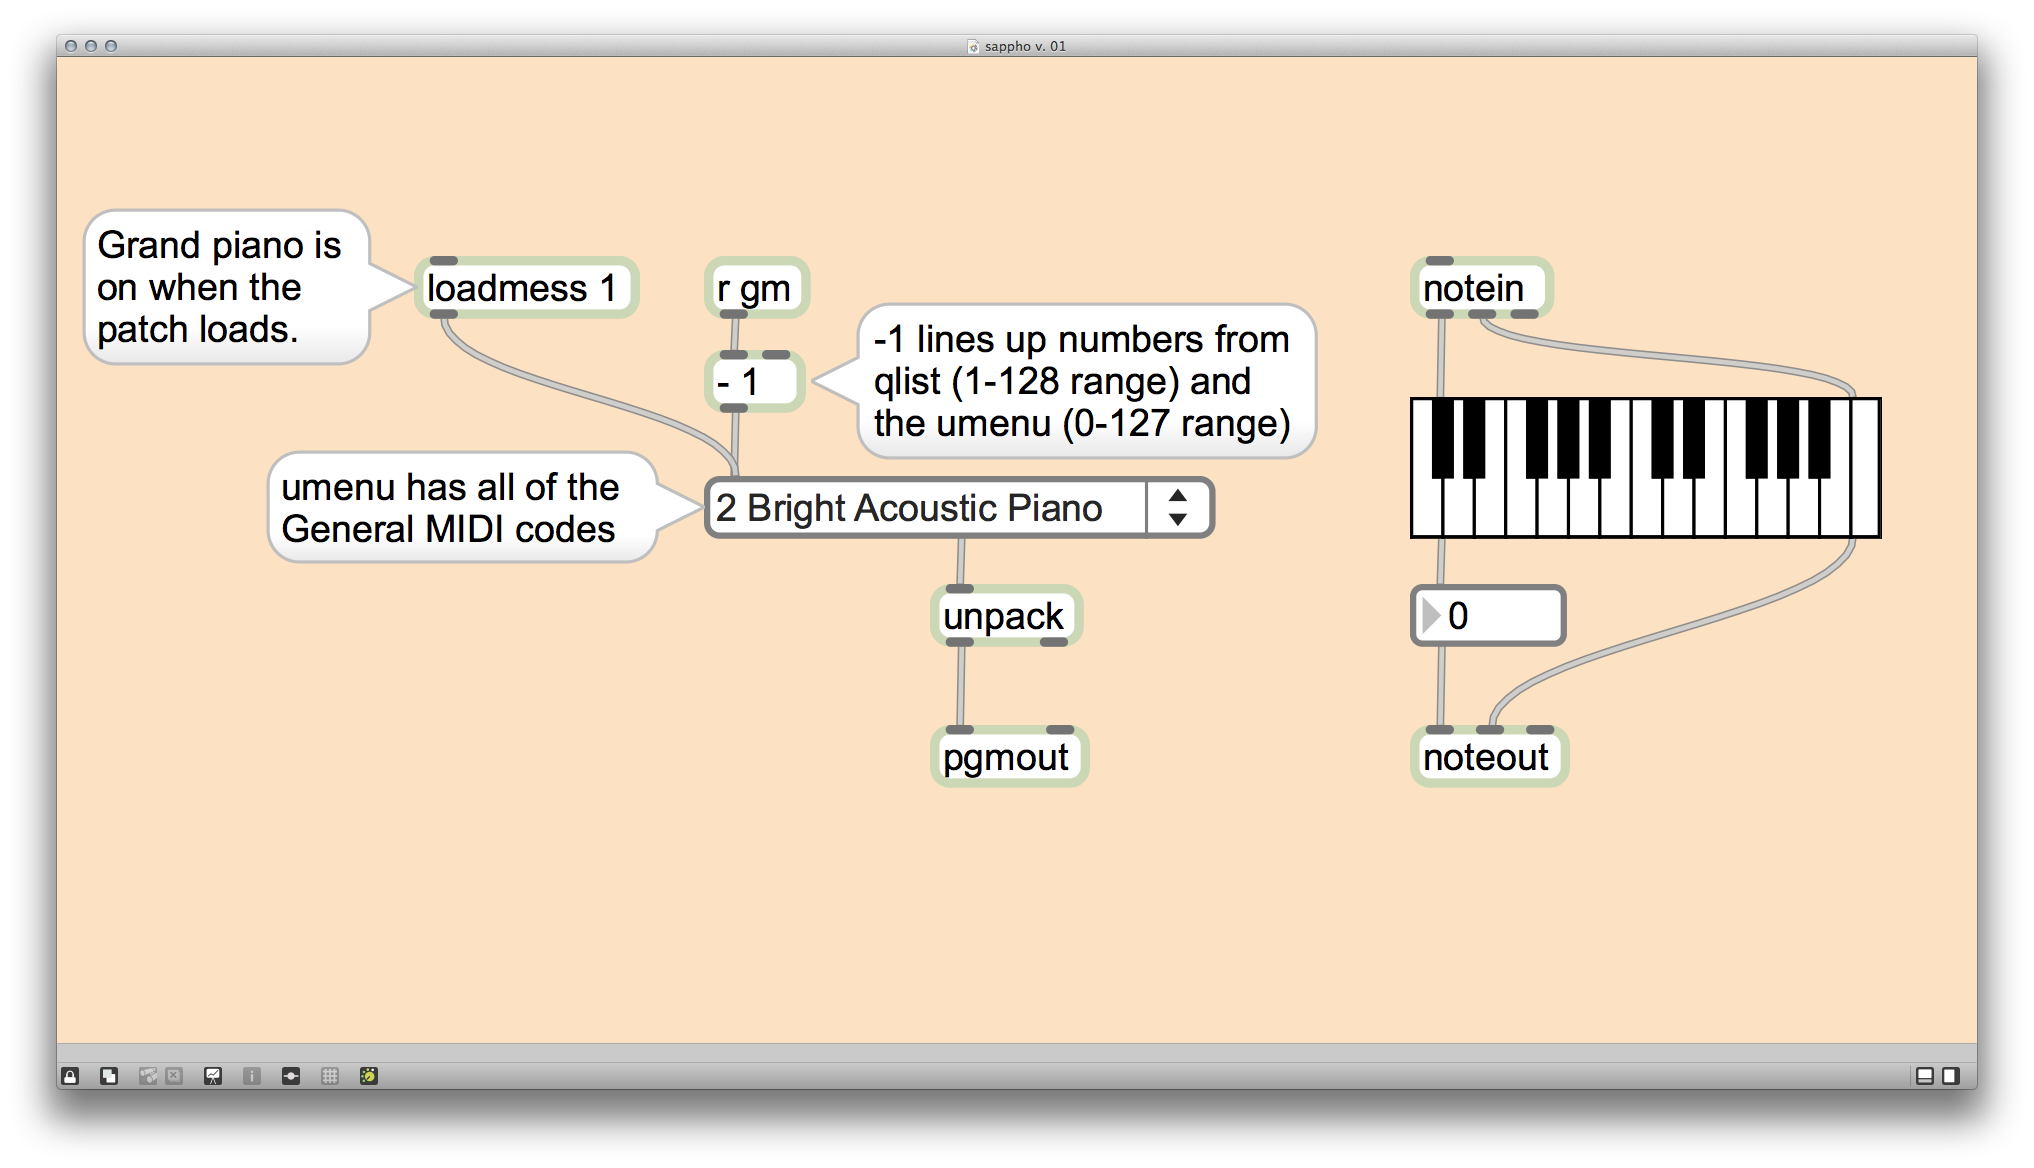
As a note, the keyboard part of Variation 3 was possible using Tom Mudd's Just Intonation Toolkit, which is an application developed in Max/MSP that makes it possible to play several variations of justly tuned scales. (The video below is a short demonstration of this software.)

[youtube=http://www.youtube.com/watch?v=P_9c-MMGmI4]

I have a lot of possibilities for expanding this project in the future, hence the "v. 01" label. Stay tuned for more!

Downloads:

2 Comments

Comment

GSWA 5: Advanced Input and Output

Chapter 5 of Getting Started with Arduino is  "Advanced Input and Output." The topics covered in this chapter are:
  • Analogue input and output to allow continuous (or at least many-valued) values as opposed to just digital on/off
  • The use of a photoelectric sensor to provide continuous input and an LED to provide continuous output
  • Serial communication to permit data exchange between different programs and different hardware

All of this is really used to lay the groundwork for the extended example in Chapter 6. And this is where I have my first movie examples to show things changing gradually. (Always glad to have the iPhone handy....)

[youtube=http://www.youtube.com/watch?v=3PsUrpE3t7c]

[youtube=http://www.youtube.com/watch?v=WEm37pCNDbU]

[youtube=http://www.youtube.com/watch?v=RNSP-XF5N9U]

Completed:

  • Getting Started with Arduino, 2e, Ch. 5: Advanced Input and Output (5 exercises)
  • Sketches (i.e., code) can be downloaded from http://db.tt/f6x9Q4NA


Comment

Comment

GSWA 4: Really Getting Started with Arduino

Chapter 4 of Getting Started with Arduino is appropriately entitled "Really Getting Started with Arduino," because this is the first chapter where we actually start hooking up wires and writing code. The goals of this chapter are relatively simple:
  • Hook up an LED to the Arduino
  • Put a pushbutton on the breadboard
  • Connect the wires and write the code so the pushbutton can turn on the LED, first as a momentary switch (i.e., the LED only lights up as long as you hold the button) and then as a toggle switch (i.e., click it once to have the LED turn on and stay on, then click it again to have it turn off and stay off)

Simple concept and an excellent introduction to the entire system. I'm much more accustomed to working with Processing and, while the two are very closely related, they're not identical and the differences are acutely obvious to me. Still, I'm trying to adapt.  Some of the differences include:

  • Explicitly declaring constants
  • Setting pins as input or output (obviously, this doesn't happen in the software-only world of Processing)
  • "digitalRead" and "digitalWrite" as functions (again, because this is hardware now)
  • The use of "HIGH" and "LOW" as "ON" and "OFF" (I know the latter work but there is a strong institutional preference for the former)

On the other hand, much of the building and troubleshooting procedure is the same: go one tiny step at a time, when something goes wrong, take a closer look at how the machine is making sense of your code, and working through possible solutions one at a time, perhaps through commenting lines in and out. And save versions of your sketch!

So, the fact that I am now able to turn a small light on and off may not seem like much to most people, but it's a significant journey from the virtual to the physical world for me. Onward and upward!

Completed:

  • Getting Started with Arduino, 2e, Ch. 4: Really Getting Started with Arduino (5 exercises)
  • Sketches (i.e., code) can be downloaded from http://db.tt/f6x9Q4NA

Comment